I recently wanted to setup a continuous integration server for some internal force.com projects we have at the Foundation. I had a pretty difficult time finding clear instructions from start to finish in one space, so I thought I’d compile them here. For this walkthrough, we’ll be using AWS/EC-2.
First things first, make sure you have your source and target force.com instance, a Github account, and an Amazon AWS account too. If you don’t want to deal with AWS, you can also use a service like Cloudbees for hosting Jenkins. There’s a really good demo video on setting it up through Cloudbees done by Jeff Douglas here. Again, you’ll still need to muck around in Linux a bit to get it going (or Windows Server, though this walk through will be done using a Linux image). There’s also a great article on Force.com and CI by Josh Birk here. A couple of other good CI walkthrough videos are available here and here as well.
AWS Setup
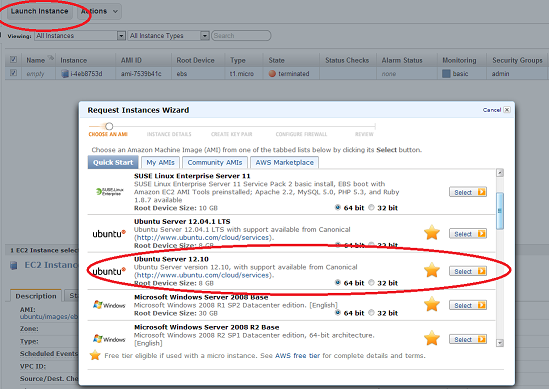
Assuming you have your Salesforce, AWS and Github accounts ready, we can get started. Head over and login to your AWS instance. Once you’re in the EC2 console, select ‘Launch Instance’ and then the instance type. For this walkthrough, we’ll use Ubuntu Server 12.10, but you can use whatever flavor you’re comfortable with. (Note: I had a bit of an issue using the default Amazon Linux AMI (CentOS) when it came time to configure perms, etc., just something to keep in mind…)
Walk through the wizard to create your instance. Make sure if you don’t already have a key pair for SSHing into your instance, that you create when the option is given. If you have an existing pair from another instance, its fine to use those as well, and that option will be provided.
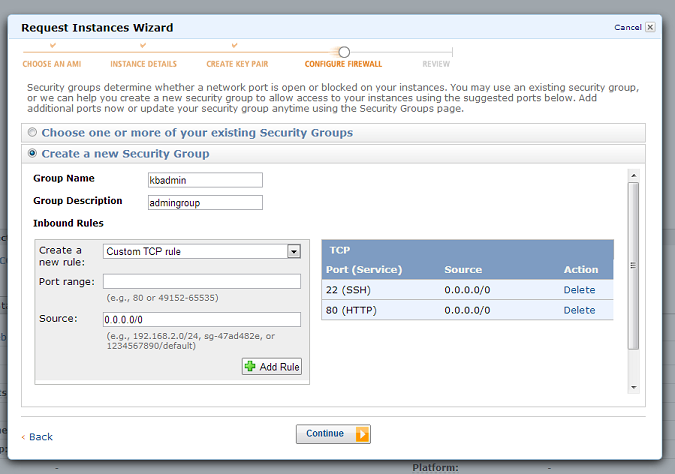
Next, you’ll need to define a security group for this user and instance. In this case you want two ports open initially: port 22 so you can SSH-in and access your instance, and port 80 so you can actually see Jenkins over the internet. You can modify your port setup later for security if you so choose, but we’ll stick with the default for now.
Once you’re done configuring security, go ahead and launch your instance, it’ll take a few minutes for it to spin-up. Once its up and running, you’re ready to connect using an SSH client, that could be a Linux/Mac SSH/bash client, or it could be WinPUTTY, or even the default client that AWS allows you to launch from the browser. Keep in mind if you use WinPUTTY you’ll need to convert the AWS keypair into a WinPUTTY keypair using the WinPUTTY keygen tool. Cygwin is also totally valid here too. Whatever tool you use, go ahead and auth in as the ‘ubuntu’ user instead of root. ubuntu@myinstanceipaddress.compute-1.amazonaws.com
Configuring nginx & installing Jenkins
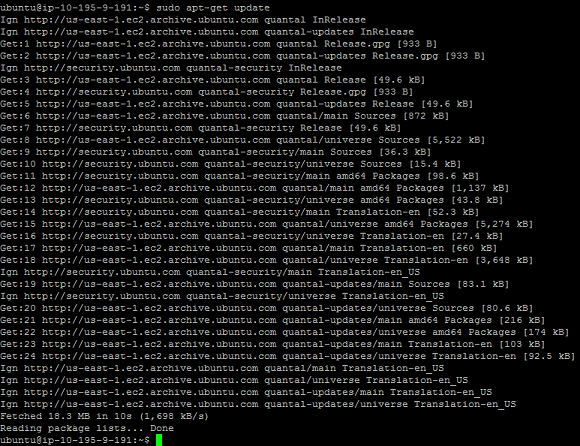
Congrats, you’re now running your very own Linux server in the cloud! Our next step will be getting all of the packages we need to actually do something useful. First thing we need to do is make sure our package manager is up-to-date. From your command line:
sudo apt-get update
You can also use aptitude as well. If you’re using a different Linux flavor (the default Amazon AWS image uses CentOS), you may be using yum as your package manager.
Now we need a webserver to host Jenkins on. We’ll use nginx for this, which we can get using our updated apt-get command:
sudo apt-get install nginx
Then start the nginx service with:
sudo /etc/init.d/nginx start
You should now be able to use your web browser to see your server. You can go to:
http://ec2-XX-XX-XX-XXX.compute-1.amazonaws.com/ or just use the straight IP address.
If everything is configured properly, you should see something like:
Now that your webserver is setup, we can install Jenkins. Back on your command line, type:
sudo apt-get install jenkins
NOTE: If you’re not using Ubuntu and have yum instead, you may need to add the repository first:
sudo wget -O /etc/yum.repos.d/jenkins.repo http://pkg.jenkins-ci.org/redhat/jenkins.repo
sudo rpm –import http://pkg.jenkins-ci.org/redhat/jenkins-ci.org.key
Now, lets start up Jenkins:
sudo service jenkins start
If for some reason the service isn’t starting, you can also initialize it through init.d:
sudo /etc/init.d/jenkins start
Now we need to forward our requests on port 80 (where nginx is listening) to Jenkins, which is listening on port 8080. You can use handy old vim or whatever text-editor you’re comfortable with to do this. First, navigate to the nginx site-available directory and remove the default:
cd /etc/nginx/sites-available
sudo rm default
Now, create a new file, we’ll call it ‘jenkins’:
sudo vim jenkins
Enter the following info:
upstream app_server {
server 127.0.0.1:8080 fail_timeout=0;
}server {
listen 80;
listen [::]:80 default ipv6only=on;
server_name ci.yourcompany.com;location / {
proxy_set_header X-Forwarded-For $proxy_add_x_forwarded_for;
proxy_set_header Host $http_host;
proxy_redirect off;if (!-f $request_filename) {
proxy_pass http://app_server;
break;
}
}
}
Now, link the file you just created in sites-available to sites-enabled:
sudo ln -s /etc/nginx/sites-available/jenkins /etc/nginx/sites-enabled
Restart nginx:
sudo service nginx restart
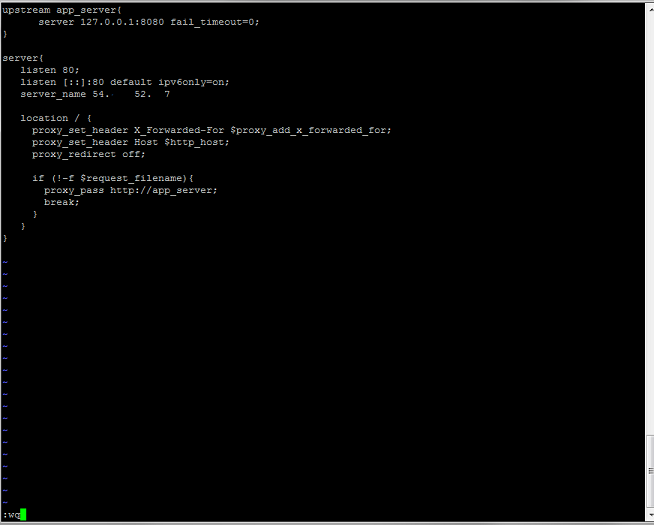
If there are any problems with your config file, nginx will let you know on restart. Here I forgot a semi-colon in the config file (you can see it missing in the image above):
Now you should be able to navigate back to your IP address as we did above, and instead of your nginx welcome screen, you should see your very own Jenkins instance up and running!
Configuring Jenkins
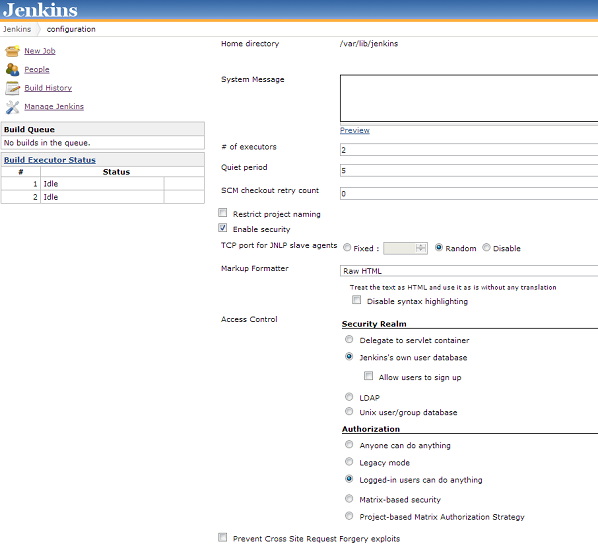
Jenkins is up and running, but we don’t want just anybody getting in. There’s lots of security configuration options available for Jenkins (LDAP, etc.), but we can also use the built-in Jenkins user database to make life easy. From your Jenkins dashboard, select ‘Manage Jenkins’ then ‘Configure System’, check the ‘Enable Security’ box, select ‘Jenkins own user database’ and disallow signups. Then select ‘Logged-in users can do anything’, then save. You’ll then be prompted to create a master user, go ahead and do so.
A quick digression. You may see something like this in your Jenkins configuration screen:
“New version of Jenkins (1.480.3) is available for download”
This happens if the apt repo isn’t the most up-to-date version. Normally, you’d just click the link, download it, and install. Of course, downloading it to your local machine is a bit pointless since Jenkins lives on your EC2 instance, but we can still do an update, we just do it from the command line. To update your Jenkins, we need to get the install first, using the same link provided in the message. Navigate back to root, and wget the file. For me, it looked like:
cd /home/ubuntu
sudo wget https://updates.jenkins-ci.org/download/war/1.480.3/jenkins.war
That leaves the .war file in my home directory. From there, I can just copy it over the existing .war file:
sudo cp jenkins.war /usr/share/jenkins.war
Then restart Jenkins:
sudo service restart jenkins
You may need to restart Ubuntu to see the change reflected, feel free to do so at your leisure.
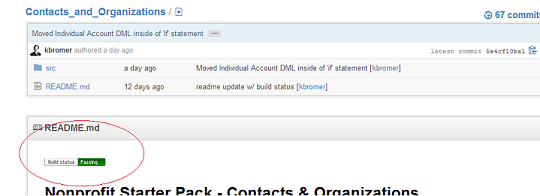
Now we need to install some plugins for Jenkins to help us do the work we need to do. Under ‘Manage Jenkins’, ‘Manage Plugins’ we can select from some the many available plugins. For our purposes, the Github plugin (and the dependent plugins it will select) should be sufficient for now, just select the ones you want under the ‘Available’ tab and click ‘Install’. There are some fun ones in there too, including an emotive Jenkins and the Embedable Build Status plugin, seen below:
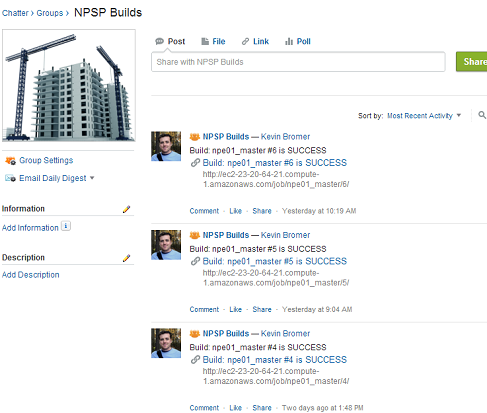
We can also add our own custom plugins from the advanced tab. I’d HIGHLY recommend Simon Fell’s Hudson Chatter plugin. It can be found here. Simply extract the .hpi file and in the ‘Advanced’ tab, select the file and hit ‘Upload’. You may need to restart your Jenkins service once your plugins are installed:
sudo service jenkins restart
You’ll now have the ability to Chatter on commits in a post-build step like this:
Configuring Java, Ant & Git
Back to the command line, we’re almost ready to setup our first build, but before we do that, we need to make sure we can successfully connect to our Github repository, and that Java, Ant and the Force.com Migration tool are all properly configured on our instance.
First, lets start with Java, we’ll need both the Java runtime and the JDK available. Many images have them preinstalled, lets make sure they’re setup properly here.
java -version
Should show you the the version of the JRE you have installed, if you have it installed. If not, you may need to go and get them from apt. A quick Google search will show you how. You’ll also need to get a JDK so Ant can run properly. You can do that with the following command:
sudo apt-get install openjdk-7-jdk
You’ll need to make sure ant is around, use:
which ant
to make sure that ant is installed.
Finally, we’ll need Git.
sudo apt-get install git
With git installed, we now need to connect to Github. Github has some pretty good instructions for doing so that we’ll follow here.
First, configure your local user based on these instructions. Now we need to switch to the ‘jenkins’ user that Jenkins runs under (this user was automatically created for you when you installed Jenkins). To do that, we may first need to set a password for that user.
sudo passwd jenkins
Setup your password, then switch to the jenkins user:
su jenkins
Now, you’ll need to follow Github’s instructions for creating a new deploy key for Jenkins, so that Jenkins is authorized to view your repositories on Github. If you’re logged in as the jenkins user when you do this, this should create a new id_rsa.pub file in /var/lib/jenkins/.ssh/
Make sure your deploy key is saved in Github in the appropriate place, either in a specific repo, or under your user account settings. Make sure you also follow the Github instructions all the way through to the end (actually attempting to SSH in as that user), as that will confirm everything if connected properly and add Github to your list of authorized hosts.
Now lets make sure the Force.com Migration tool is installed properly. We’ll need to get the migration tool from a Salesforce instance. I’ve also hosted it temporarily on my own website. Feel free to download it here, but no guarantees it will remain in place. Navigate to our home directory. If you’ve been following along:
cd /home/ubuntu
Then retrieve the Salesforce Ant jar zip file here (or any other place you wish to host it):
sudo wget -O salesforce_ant_27.0.zip http://www.kevinbromer.com/salesforce_ant_27.0.zip
Now unzip the zip file with:
unzip salesforce_ant_27.0.zip
Now we can test it. Navigate to your sample directory created by the unzip:
cd sample
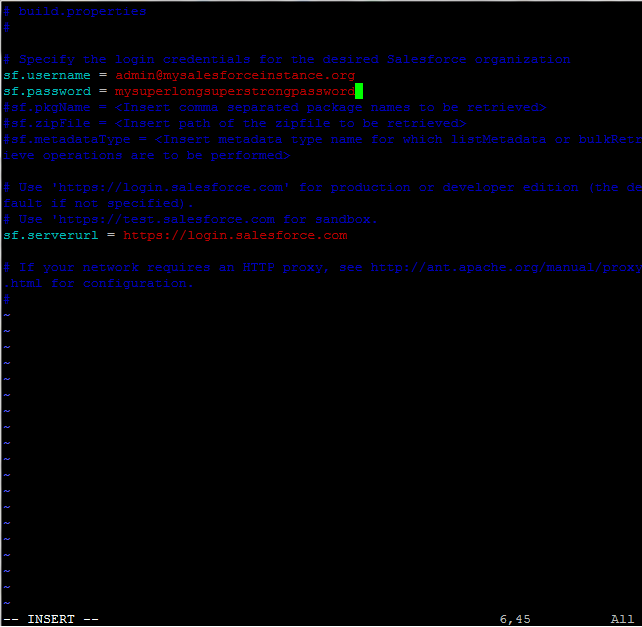
Now edit your build.properties file to include the username and password for a developer edition or other org to retrieve metadata from. (I’m using vim, you can use whatever text editor you’d like)
sudo vim build.properties
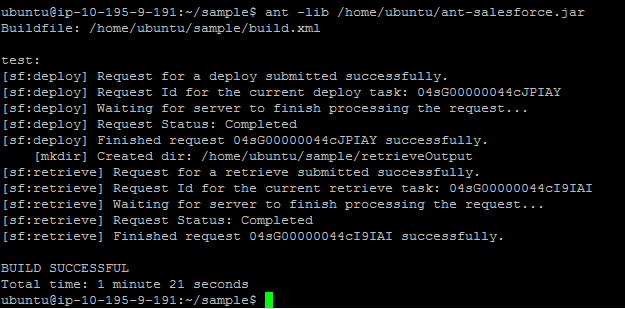
Now lets test ant by executing the default task in build.xml, a deploy of a new custom object called myobj and a retrieve of some metadata for that object. We’re going to manually specify the lib at the command line for now, and use the default task in build.xml, so our command is short:
ant -lib /home/ubuntu/ant-salesforce.jar
You should see some output similar to this:
We can now move the Salesforce ant lib into the proper directory so we don’t have to define the lib file every time on the command line:
sudo cp /home/ubuntu/ant-salesforce.jar /usr/share/ant/lib
Alright, we’ve now got Java, ant and git all setup and configured in our environment, now lets head back over to Jenkins to configure a project.
Configuring a Project
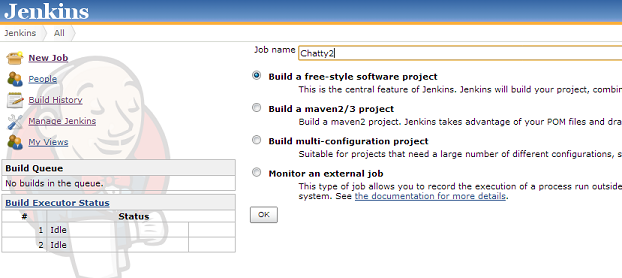
Lets head back to Jenkins now, you may need to log back in. Now lets create a new job. Select ‘New Job’, and then ‘Build a free-style software project’, make sure to provide a name of your own.
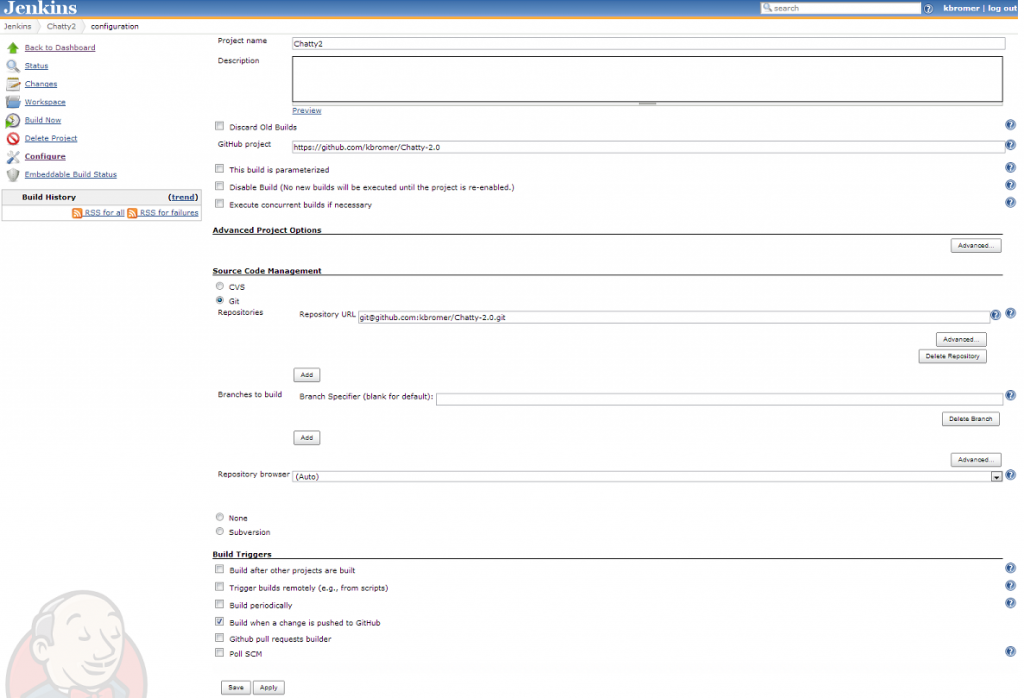
Now, we need to configure our project. Provide the URL to your project under Github project, and select ‘git’ under ‘Source Code Management’. Provide your login to your repository under ‘Repositories’ in the form of: git@github.com:UserOrOrgName/RepositoryName.git You can also select ‘Build when a change is pushed to Github’. This will cause your build to happen every time a change is made to your Github repository. You may also want to run them periodically, or even user the pull builder. Click ‘Save’ when done.
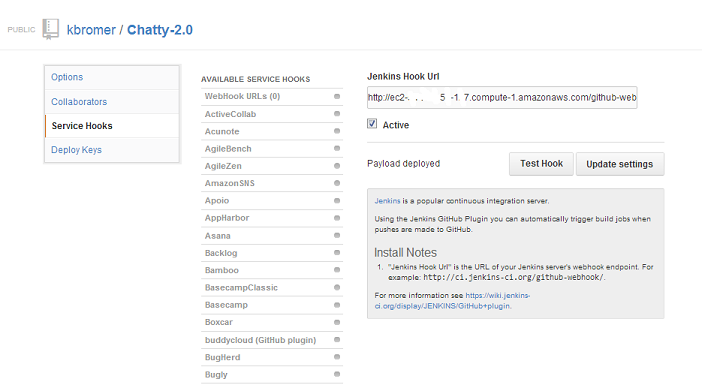
Now lets setup Github to talk to Jenkins properly. We can do this with a baked in Github feature called ‘Service Hooks’. Under your repository in Githubn, click on the ‘Settings’ tab, and select ‘Service Hooks’. Select ‘Jenkins (Github Plugin)’ from the list of available hooks, and the url to your AWS instance, with github-webhook as the directory. For example:
http://ec2-12-345-67-891.compute-1.amazonaws.com/github-webhook/
Click ‘Active’, ‘Update Settings’ and then optionally test the hook.
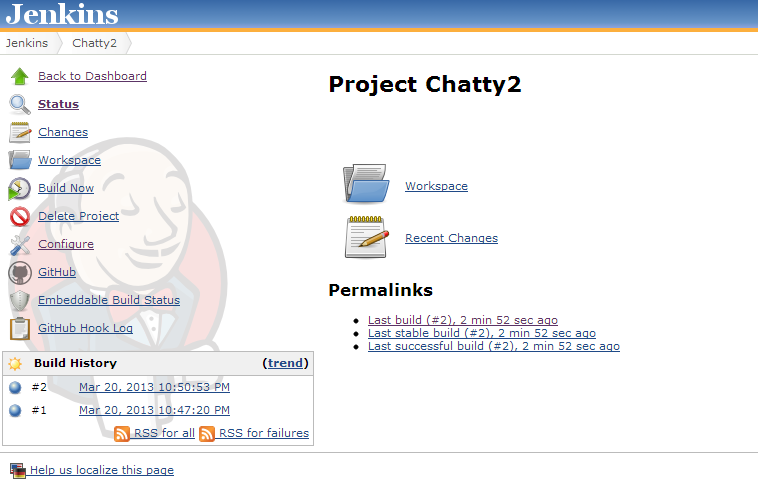
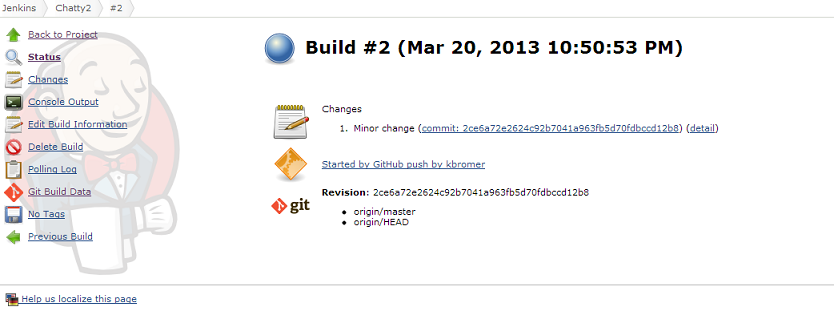
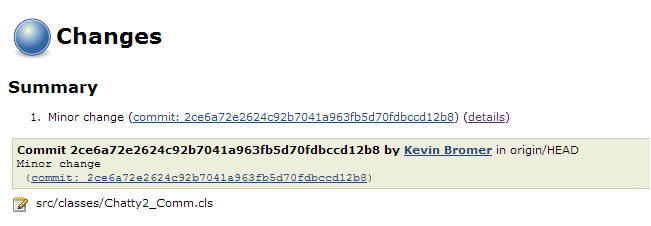
Now we can test it by making a commit to your Github repository. That commit should trigger a build in Jenkins (which doesn’t do much of anything for the moment), and you should be able to see the commit, the commit status, the commit message, and even what classes changed by looking at the detail link!
Build, Post Build & Some Thoughts on Configuration
We’re now connected. Salesforce is talking to Github, Github to Jenkins, Jenkins can now connect back to Salesforce with Ant. A virtuous circle indeed, where do we go from here? Under the ‘Configure’ menu for your project, you have the option to select Build and Post Build steps. This is the meat of your CI plan. From here, you can schedule automatic deploys to a staging environment, production or even to a UAT environment using Ant (the Migration Tool Guide is here). You may want to invoke a shell command as well. For example, a bash script that uses sed to strip namespaces from managed package source and pushes the results to an unmanaged repository for easier usage. Post build, you can use the Chatter Publisher (there’s other social network publishers too, if you want to post your results to Twitter, for example), or the Git publisher to push tags, merges or other results back to the repository. You can configure email notifications or even kick-off the build of another project. Check out Josh Birk’s post on DeveloperForce on setting up Jenkins for some good details.
You will want to be careful of one thing: Jenkins runs as its own user. Make sure the ‘jenkins’ user has permissions to run ant, the salesforce libs, access to git, and any other tools or commands you need. The chmod command is your friend here when troubleshooting permission errors.
Finally, I want to quickly mention directory structure. By default in this environment, Jenkins creates its git clones in /var/lib/jenkins/workspace You can cd there and see your git repositories that have been ‘built’ (cloned) from Github. My approach has been to ditch build.properties for un/pw, and use the build steps in build.xml instead for that. I keep a seperate directory for my build files at /var/lib/jenkins/workspace/build and a seperate directory for other command line scripts at /var/lib/jenkins/workspace/scripts Then when running ant, I simply define the build file I want to use the -buildfile switch to define the build file location for that particular workspace. Same with the scripts, I can call them directly via the path. Its really more an organizational technique, and it keeps me away from the temptation of storing them with git.
Security & Maintenance
Last things before we wrap this up. You’re now a server administrator, which means you do have to do some maintenance to make sure your Ubuntu instance is safe and secure. Always make sure your packages are up-to-date and fully upgraded. This can be done with a simple:
sudo apt-get update
sudo apt-get upgrade
You may also want to consider doing things like changing your default SSH port and hardening your instance. There are good getting-started articles on security basics that I recommend here and here.
Good luck, happy integrating.


