I often get requests for a new instance of the NPSP to “play around with”. Not a big deal, you can always get the six core packages (including Batch Data Entry) via the Appexchange, and figure using the step-by-step install instructions to reproduce the exact same environment you get on trial install. But what if you want to hack on the code a little bit? Well, if you know what you want to work on, you can easily pull the managed code down for any one of the packages from the SalesforceFoundation Github site, resolve any namespaces and dependencies you’re off. However, if you want the whole enchilada, we have available the NPSP-UM repository. This post will show you how to fork, fetch, and configure your own unmanaged version of the NPSP using Eclipse/Force.com IDE, EGit, and your own Developer Edition. In addition, you can use this same technique to pull down the managed code, and easily contribute your changes or modifications back to the core NPSP code!!
First, disclaimers & prerequisites: You need to download and configure the Force.com IDE or Eclipse (we’ll call it just ‘Eclipse’ throughout the post for the sake of brevity), EGit and acquire your own Developer Edition and signup for a Github account, all free. Setting up and configuring these tools is a bit beyond the scope of the post, but there are a bunch of resources out there, including ones like these (in approximate order of usefulness ;). I should also add that there’s likely more than one way to work with Github and the Force.com projects, there are several excellent posts out there already, this is just how I create my forks and repositories. Insights and opinions are welcome below. Finally, I HIGHLY recommend NOT using this technique to install a production instance of the NPSP. You’ll be unable to upgrade, unable to patch, and generally less stable and solid than the managed version. Additionally, if you’re using an unmanaged version, its nearly impossible to troubleshoot from a 3rd party should something go wrong. In other words, don’t do it. Don’t say I didn’t warn you.
Let’s get started. After you’ve signed in to your Github account, navigate over to the NPSP-UM repository, and click ‘Fork’ in the upper-right-hand corner. This creates your own version of the repository to use as you please.
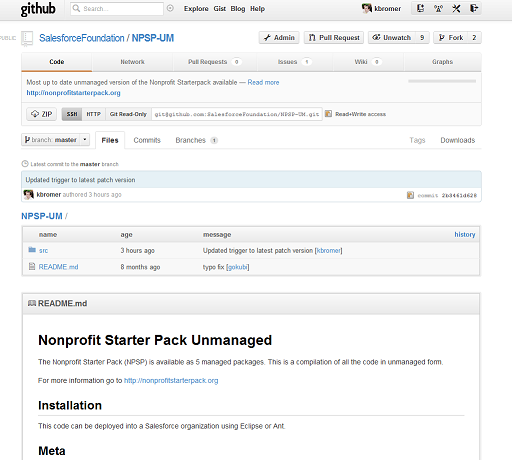
Once your fork is created, take note of the URL. Generally they take the form of “YourUsername/RepositoryName.git”.
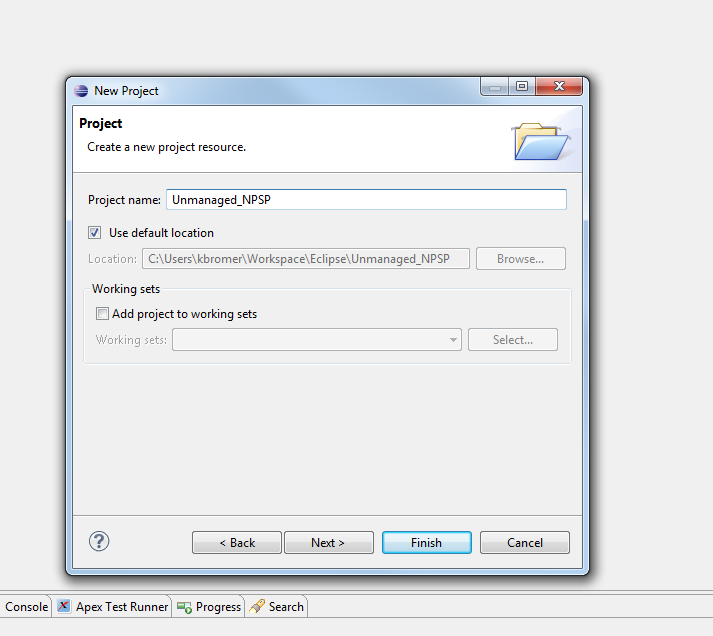
Now, swing over to Eclipse and right-click in your Package Explorer or Navigator, select ‘New’, and select ‘Project’ to create a new project. Fill in the information as required, you can use whatever Project Name you’d like. Click ‘Finish’.
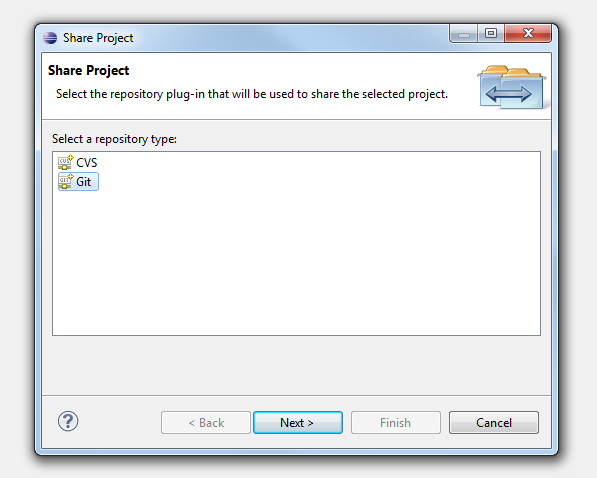
Once your project is created, right-click on the project and select ‘Team’ and ‘Share Project…’
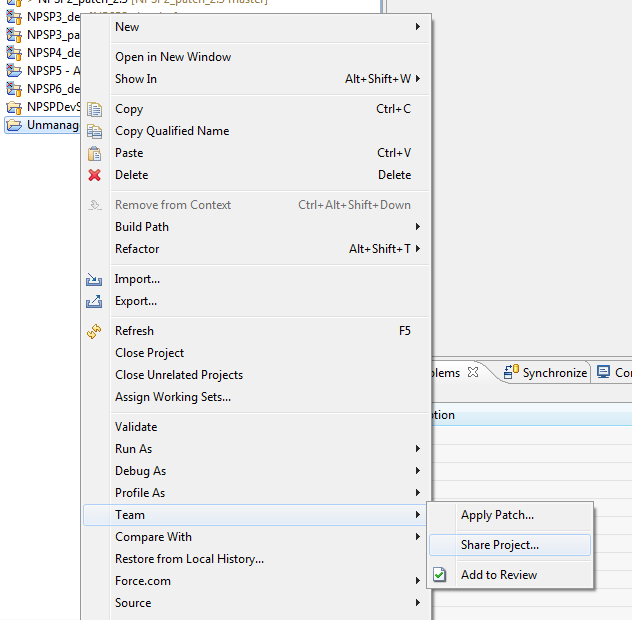
Select ‘Git’
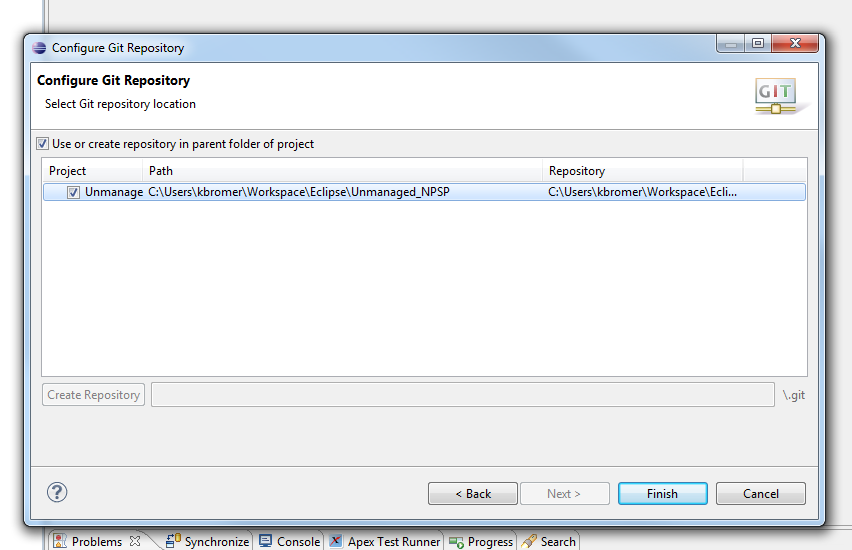
Select ‘Use or create repository in parent folder of project’, then ‘Create Repository’, then ‘Finish’. I should note here that there is some disagreement about this. We’re essentially creating a new folder for your git files to live in that is in the same folder as your project, living in your Eclipse workspace. Many people think this is a no-no, because you’re adding things to the workspace that need not be there, as well as a variety of other well-thought-out reasons I’m sure. Still, I don’t care, this seems more logical to me and keeps everything in one place, nice and neat. If you feel strongly one way or the other, obviously choose wherever you’d like to put the repository.
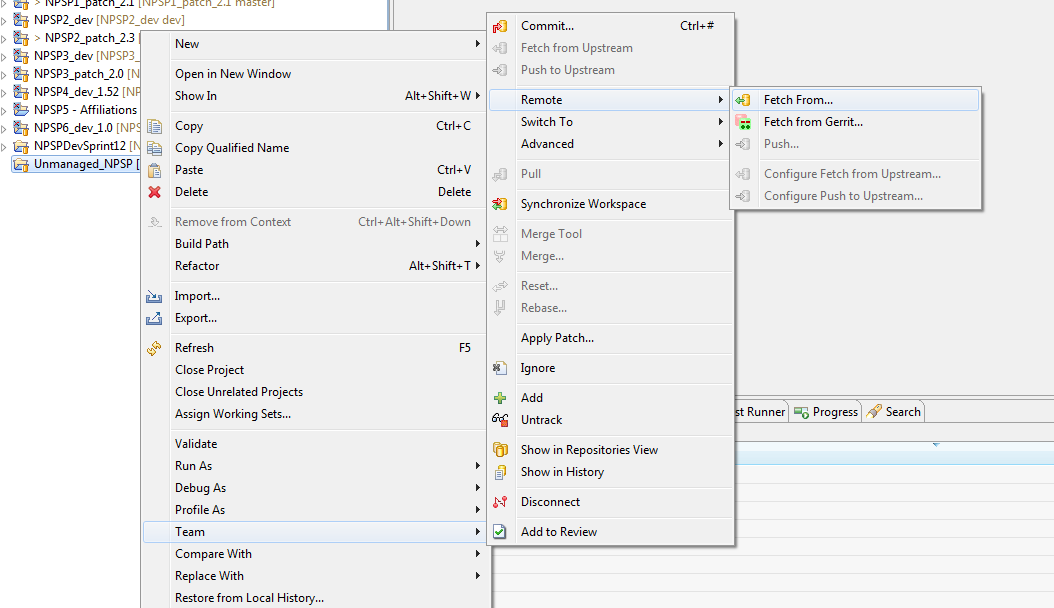
Once your repository is created, we need to connect it to your remote repository on github. Make sure you’ve configured EGit for working with Github already! Right-click on your project and select ‘Team’->’Remote’ and ‘Fetch From…’
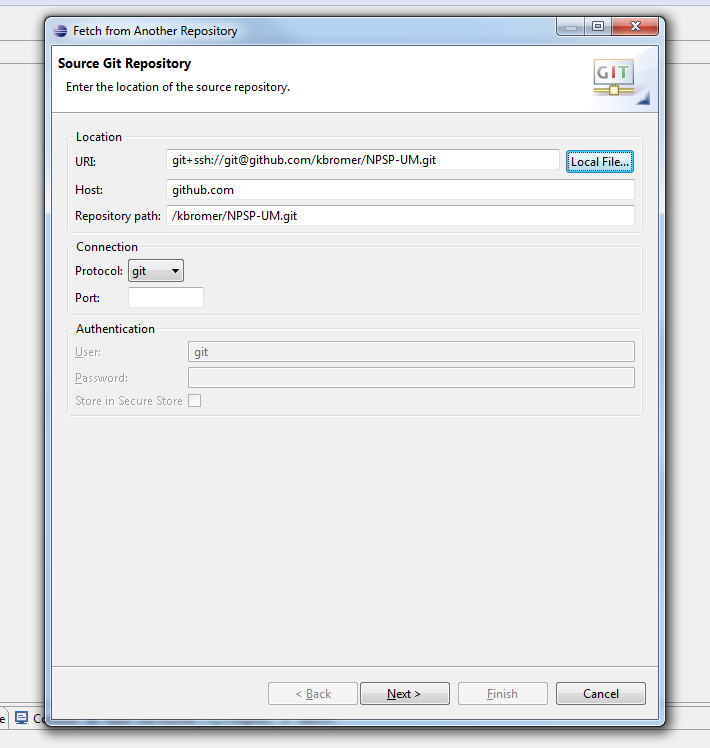
Fill out your Source Git Repository. Obviously, your repository won’t be ‘kbromer’, but rather your username. The key things are getting the protocol to ‘git’, and getting the URI, Host and Repository Path set properly.
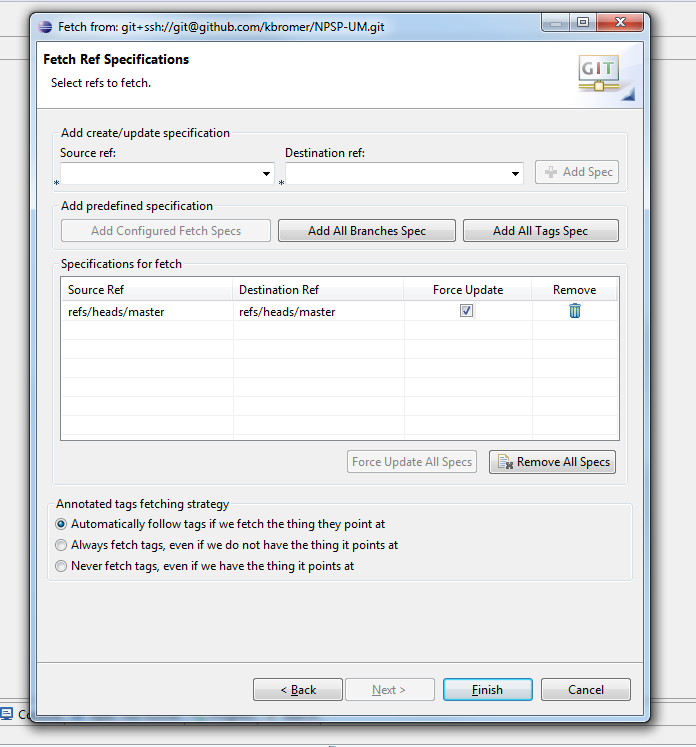
Once you’re that’s been confirmed, you need to select which Source and Destination ref you want. From the Source, you can generally select whatever the head of the latest branch is, refs/heads/master. You can also just grab ‘HEAD’. Keep in mind repositories can have different branches. For example, in NPSP packages, the master branch will always contain the latest stable ‘in-the-wild’ release of that particular package, while the ‘dev’ branch will have the code for the next non-patch version. For NPSP managed packages, if you want to add new field, schema changes, new classes or change the signatures of existing global classes, you’ll need to use the ‘dev’ branch. Minor code tweaks and changes can be in the ‘master’ branch, since they can be ‘pushed’ to package users.
For your Destination ref, you’ll want to use the same specification. Since we don’t actually have anything yet in our local repository, we want it in perfect sync with our remote repository. So simply filling in the refs/heads/master (or dev) so your source and destination ref match will work here. Click ‘Add Spec’, then check ‘Force Update’, since we want to force the fetch to update our local repository. When you’re done, click ‘Finish’ to begin the fetch process.
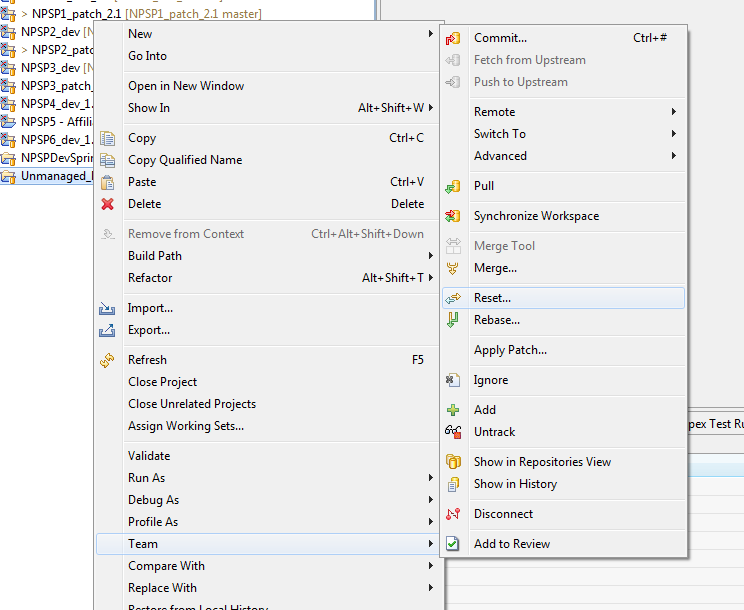
Once the fetch is complete, we’ll want to reset our local branches to be in sync with what we just fetched from Github. To do that, we’ll right-click on our project, go to ‘Team’ and ‘Reset’.
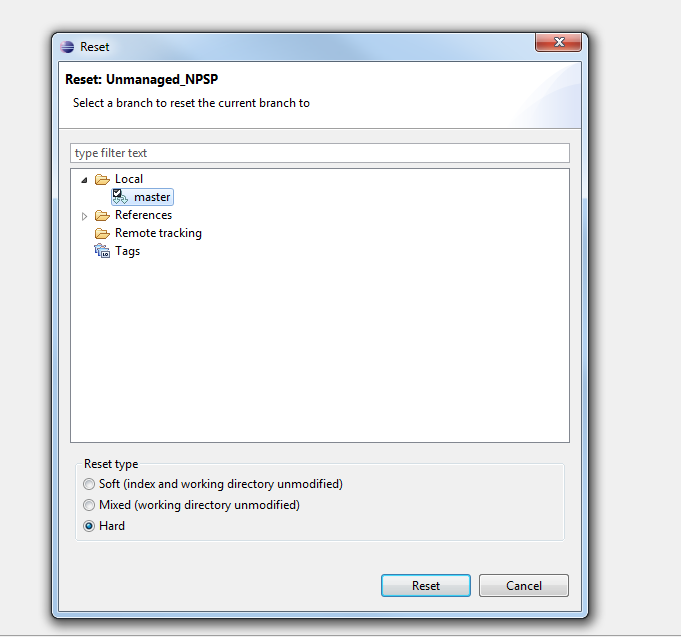
Select our local ‘master’ (or other branch) if its not already selected, and use a ‘Hard’ reset type. This forces our local branch to conform to what we just fetched from Github.
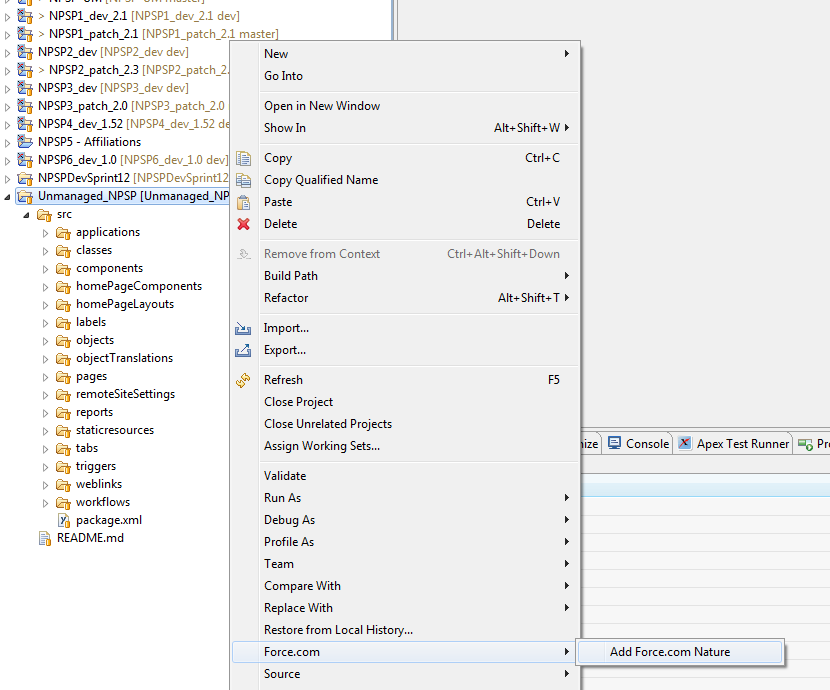
Now we have a working repository in our local Eclipse that’s in sync with our remote Github repository. Now its time to get us synced up to our Developer Edition!! First, right-click on our project, and select ‘Force.com’->’Add Force.com Nature’
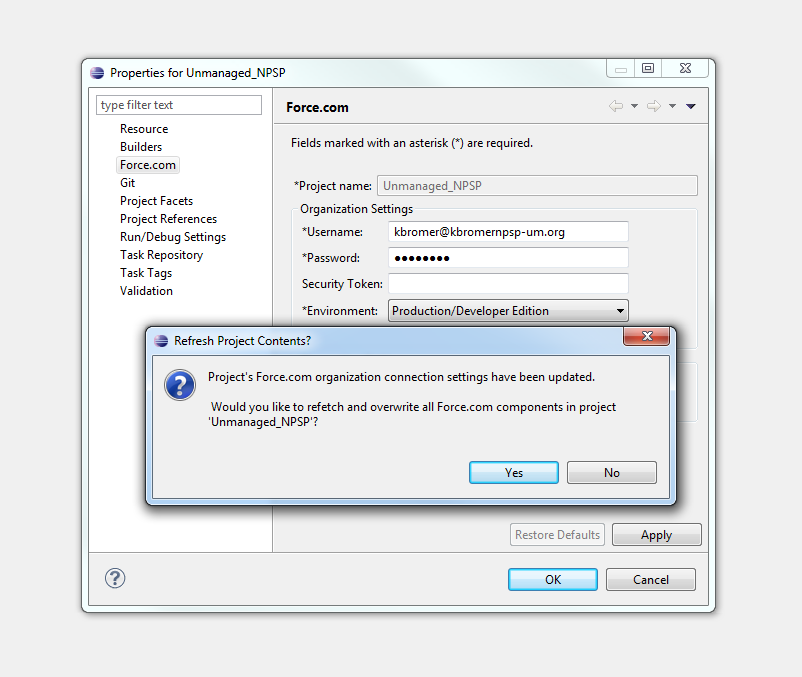
We’ll be notified we need to add our login credentials for our Developer Edition org. Right click on the project again, go to ‘Force.com’ and select ‘Project Properties’ Fill in your username and password (and security token if needed) and select ‘Apply’. When they ask if you want to refetch and overwrite all of your Force.com components, SELECT “NO”!! If we overwrite them now, we’ll be overwriting our local copy of our repository with what’s in our Developer Edition… nothing.
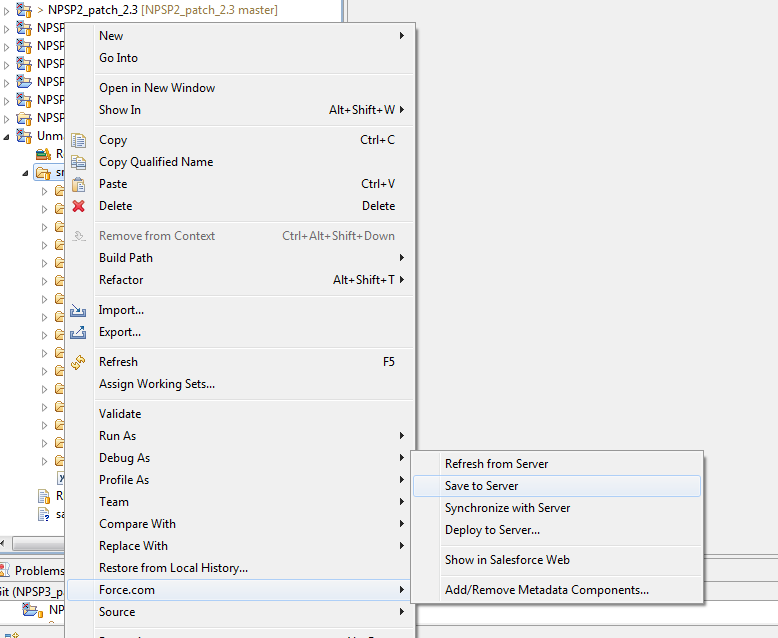
Now we simply need to save all of our repository components up to our Developer Edition. We’ll need to do this in two steps. First, highlight your ‘objects’ folder and your ‘labels’ folder at the same time, right-click and select ‘Force.com’ and ‘Save to Server’. This will deploy our Objects and Labels first, before deploying any additional code or pages. Once they’re successfully saved, select the other folders. You should be able to do all the remaining ones now, but at a bare minimum, you’ll want to grab ‘classes’, ‘components’, ‘pages’, ‘staticresources’ and ‘triggers’ at the same time. All the others can go in a separate save, or can be included in your ‘classes’ save.
If you want to get the full NPSP experience, you may also elect to use the step-by-step install instructions to do post-install configuration. One other note, you’ll also need to create new buttons for the Recurring Donations (Refresh Opportunities), Opportunity (Matching Donation) and Household/Contact Address Copy buttons. These are Visualforce buttons that were removed from the unmanaged version to help simplify the dependencies.
You’re all done! You now have an unmanaged version of the NPSP living in your very own Developer Edition instance. Keep in mind a few things when you start coding if you’re intending to contribute back to the project:
- Understand Managed Packages and restrictions. One managed package cannot ‘talk’ to another in the same way you can do here in your new Developer Edition, unless they’re related (as Contacts & Organizations and Households are)
- Use the existing repositories to see which classes belong where.
- Some managed-package specific things have been removed or commented out, since they cannot live outside of the managed package world. NPSPPkgVersionChk is a good example of this.
- If you’re serious about coding some complex cool new stuff, take a moment to read up on packaging over at Developer.force.com
- If you have questions, don’t hesitate to ask over at the NPSP Users community!
Next post, I’ll try and cover commits and pushes back to your own Github repository, though there are many resources our there available for this. We’ll also walk through pull requests for submitting code back to the NPSP, but this should get you started on the way. Good luck and happy coding and forking!


