
(Edit 3/4/16: You can now add these reports and dashboards much more quickly utilizing the mrbelvedere installer from SFDO. Just follow the link and the reports will be automatically loaded into your Salesforce org!)
Thanks to some amazing work by Gorav Seth, Albert Pulido, Tim Forbes, Ehren Foss and Marc Baizman at this past winter’s NPSP Developer Sprint, we have a set of 47 new reports and five new dashboards for new NPSP users, check’em out:
Dashboards
NPSP Campaign Metrics, NPSP Donation Forecasting, NPSP Donor Management, NPSP Grants Management, NPSP Membership
Reports
Campaign Metrics, Closed Won Opportunities by Household, Contact Giving by Best Gift Year, Contact LYBUNT, Contact SYBUNT, Contacts with Soft Credits, Contacts with Donations, Contacts with Donation Last Year, Contacts with Donation This Year, Donations by Contact State All Time, Donations by Contact State This Year, Donation by Contact Zip This Year, Donation by Contact Zip All Time, Donor Year-on-Year Comparison, Household Giving by Range, Households with Donation, Household LYBUNT, Household SYBUNT, Last Months Gifts by Donor, Open Opportunities by Stage, Open Opportunities Grouped by Stage, Organizational Giving, Organizational LYBUNT, Organizational SYBUNT, Payments Due Next 30 Days, Total Gifts by Household Zip This Year, Top 10 Household Donor, Top 10 Open Opportunities, Top 15 Won Opportunities, Total Gifts by Household State, Total Gifts by Household Zip, Total Donations by Month, Total Donations Last FY, Total Donations Last Year, Total Donations This FY, Total Donations This Year, Grant Pipeline Planning, Institutional Fundraising Goals This Year, Organizations With Grants, Total Grants Received, Total Grants Received This Year, Current Memberships, Lapsed Memberships, Membership End Dates by Month, New Members, Renewing Members
Obviously very exciting for new NPSP users, but what about existing users? How do they get these shiny new reports into their instance? Read on…
First things first, we need to make sure a few things are setup in your organization already around Opportunity record types. Because many of these reports depend on the existence of certain record types, they won’t deploy properly without them. Don’t fear, if you don’t have these existing type, you can create them, then deploy the reports, then modify the reports as needed and remove the unnecessary record types. You can also try and deploy without having the record types, though many of the reports may fail to deploy. To check your record types, go to: Setup|Customize|Opportunities|Record Types
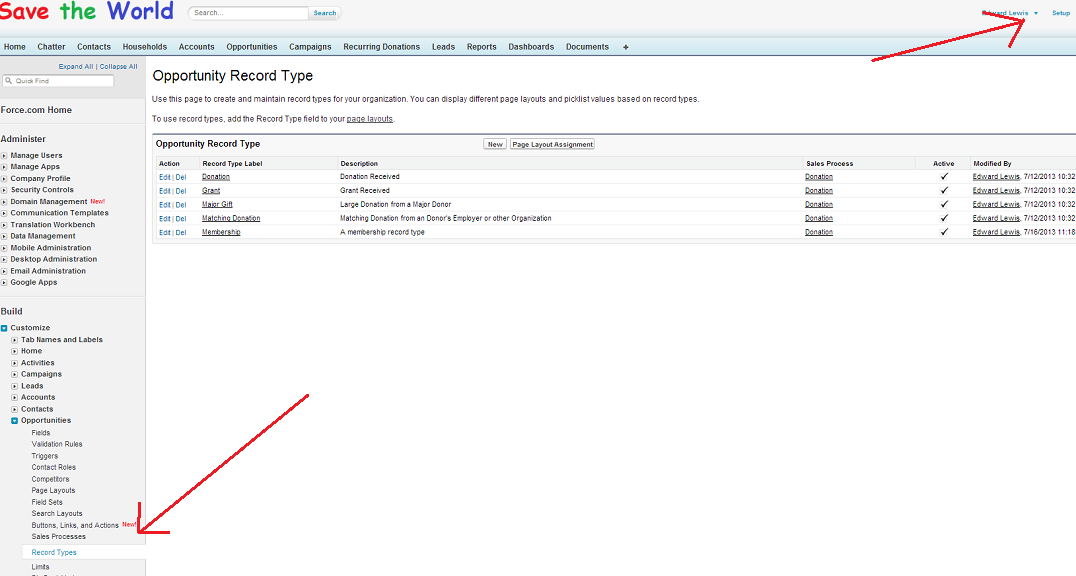
Opportunity Record Types
While the record type label can be anything, you need to make sure you have the following record type names (see the name v. the label by clicking on the record type in the menu shown above)
You need record types for:
Donation
MajorGift
MatchingDonation
Grant
Membership
Once those are in place, you’ll need to download the zip file containing the report and dashboard metadata. You can use this link, just save the zip file to your desktop or other easily accessible location.
Now comes the “hard” part. Head over to https://workbench.developerforce.com Agree to the terms of service, and click on ‘Login with Salesforce’.
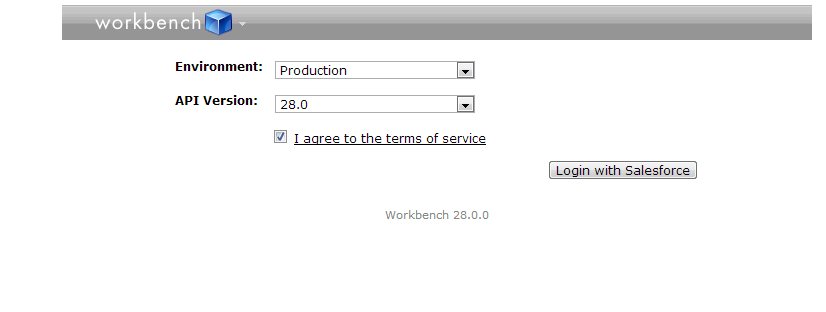
Read the terms of service from beginning to end. Shake your head in amazement at the legalese, check the box, and login.
You’ll be asked to either provide your Salesforce credentials if you’re not already logged into your org, or to authorize the workbench to access your org. Either login, or click ‘Allow’. On the next screen, select ‘Deploy’ from the ‘Jump to’ menu, and click ‘Select’.
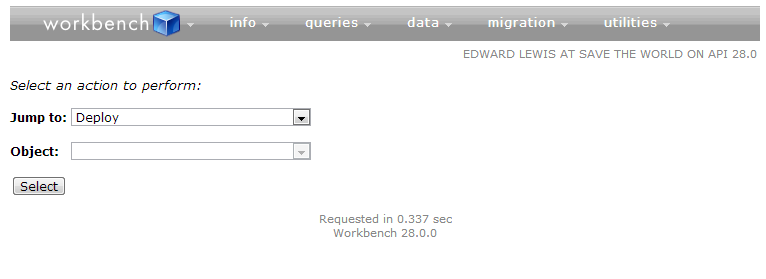
“Jump to”!?
“Select”!?
Clearly designed by a techie.
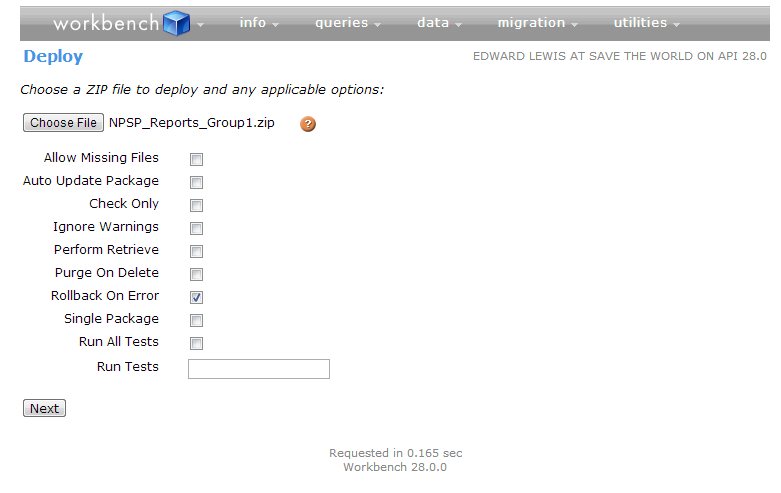
Now, check the box for ‘Rollback on Error’ and using the ‘Choose…’ button, select the zip file we downloaded earlier from your desktop (or wherever you stored it). Click ‘Next’.
This is a pithy and irreverent caption comment.
Confirm you deployment settings, and go ahead and click deploy.
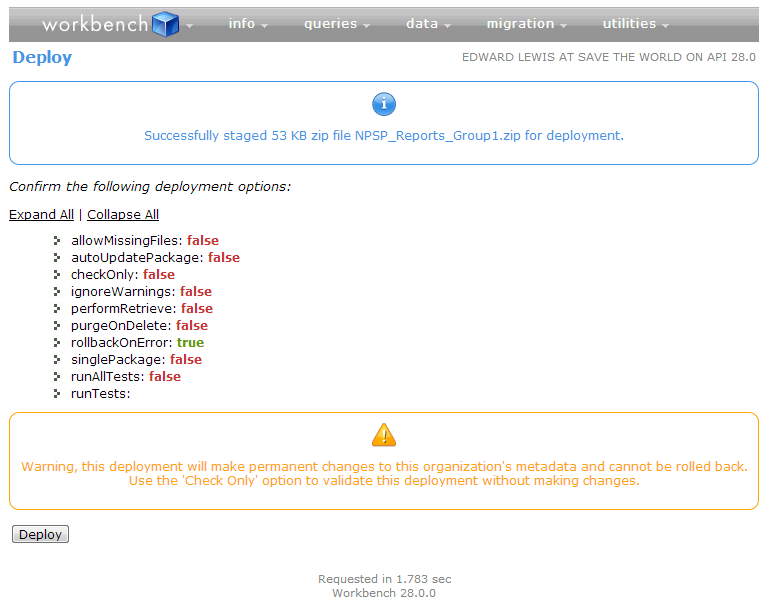
As the yellow warning text tells us, the meek can use the ‘Check Only’ option to test things out first
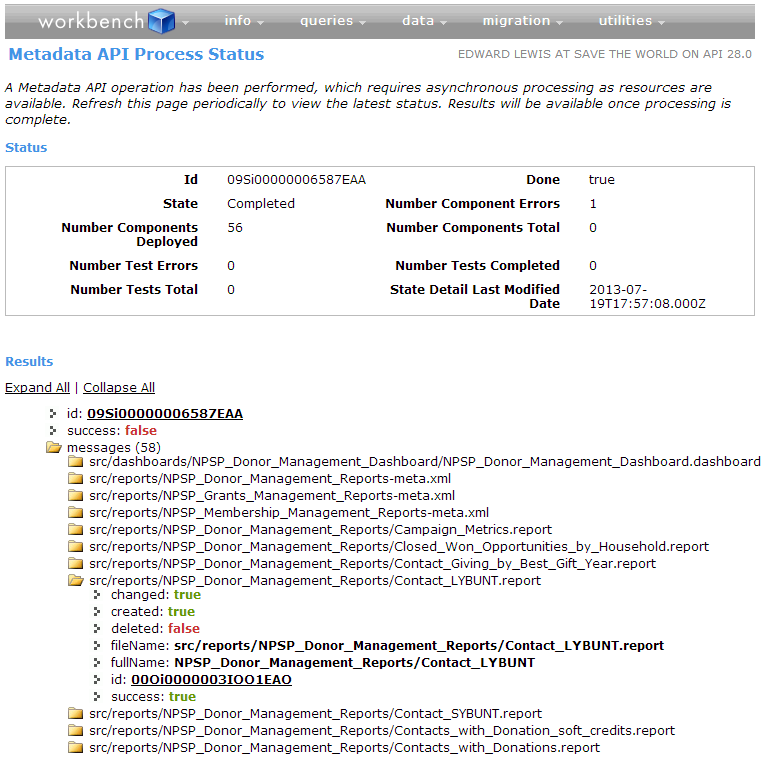
The deploy can take some time, practice patience here. When complete, you’ll get a list of the result and can drill down to each report/dashboard/folder to see how that particular object deployed. In the example below, we can see one failure and 56 successes, drilling down into the Contact LYBUNT report, we see it deployed successfully.
UI design FTW.
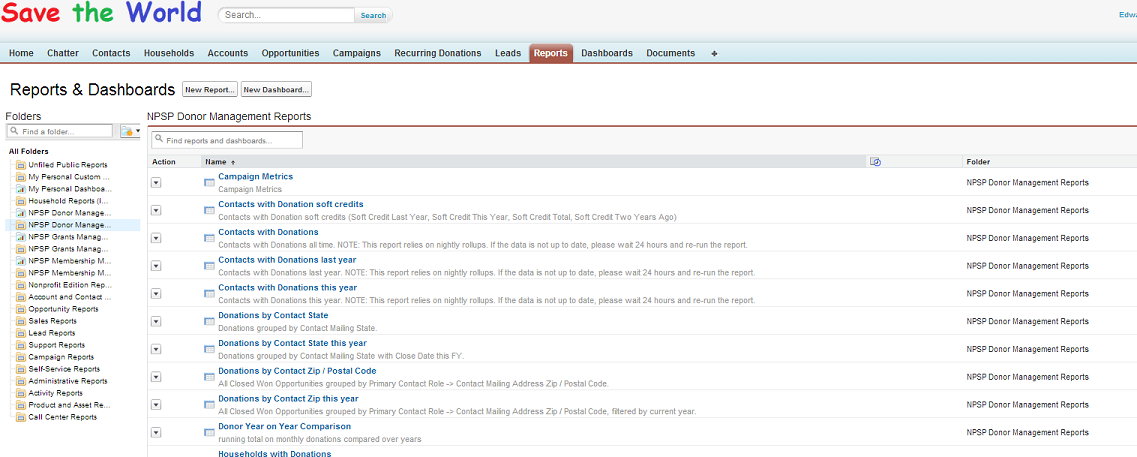
Finally, swing back into your org, click on any of the six new reports and dashboard folders, and admire the fruits of your, Tim, Albert, Marc, Ehren and Gorav’s labor!
Think of Tim, Marc, Ehren, Albert and Gorav fondly, but appropriately